
Introduction
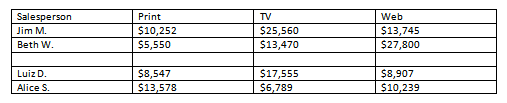
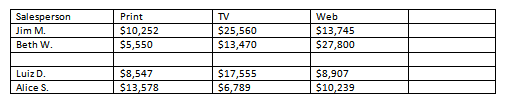
A table is a grid of cells arranged in rows and columns. Tables can be customized and are useful for various tasks such as presenting text information and numerical data.
Inserting and modifying tables
In Word, tables are useful for organizing and presenting data. You can create a blank table, convert text to a table, and apply a variety of styles and formats to existing tables.
To insert a blank table:
- Place your insertion point in the document where you want the table to appear.
- Select the Insert tab.
- Click the Table command.
- Hover your mouse over the diagram squares to select the number of columns and rows in the table.
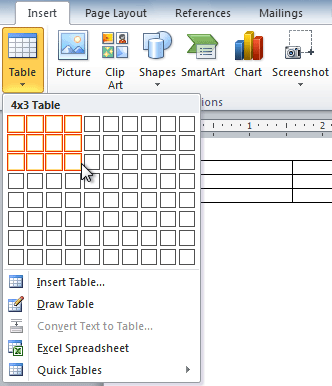
- Click your mouse, and the table appears in the document.
- You can now place the insertion point anywhere in the table to add text.
To convert existing text to a table:
- Select the text you want to convert.
- Select the Insert tab.
- Click the Table command.
- Select Convert Text to Table from the menu. A dialog box will appear.

- Choose one of the options in the Separate text at: section. This is how Word knows what text to put in each column.
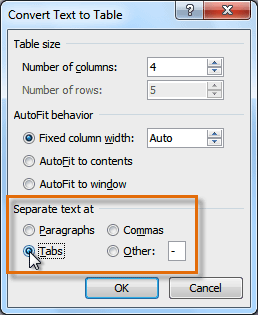
- Click OK. The text appears in a table.

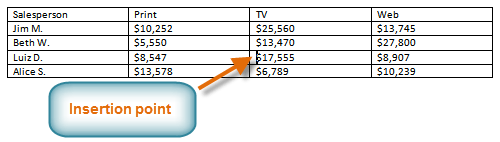
To add a row above an existing row:
- Place the insertion point in a row below the location where you want to add a row.
- Right-click the mouse. A menu appears.
- Select Insert
 Insert Rows Above.
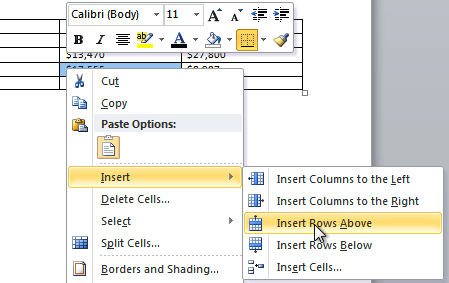
- A new row appears above the insertion point.
You can also add rows below the insertion point. Follow the same steps, but select Insert Rows Below from the menu.
To add a column:
- Place the insertion point in a column adjacent to the location where you want the new column to appear.
- Right-click the mouse. A menu will appear.
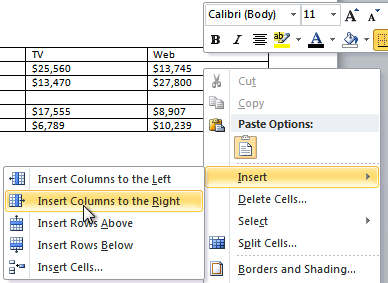
- Select InsertInsert Columns to the Left or Insert Columns to the Right. A new column appears.
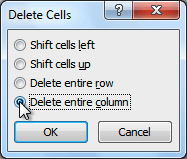
To delete a row or column:
- Select the row or column.
- Right-click your mouse. A menu will appear.
- Select Delete Cells.
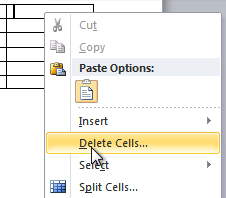
- Select Delete entire row or Delete entire column, then click OK.
To apply a table style:
- Click anywhere on the table. The Design tab will appear on the Ribbon.
- Select the Design tab and locate the Table Styles.
- Click the More drop-down arrow to see all of the table styles.
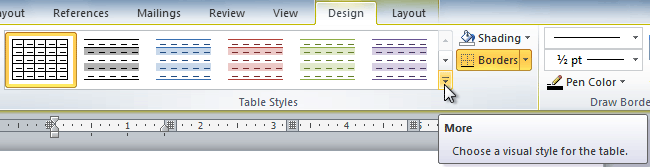
- Hover the mouse over the various styles to see a live preview.
- Select the desired style. The table style will appear in the document.

To change table style options:
- Click anywhere on the table. The Design tab will appear.
- From the Design tab, check or uncheck the desired options in the Table Style Options group.

Depending on which table style you’re using, certain table style options may have a somewhat different effect. You may need to experiment to get the exact look you want.
To add borders to a table:
- Select the cells you want to add a border to.

- From the Design tab, select the desired Line Style, Line Weight, and Pen Color.
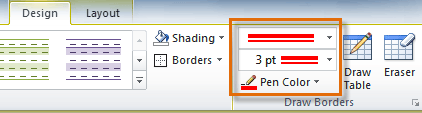
- Click the Borders drop-down arrow.
- From the drop-down menu, select the desired border type.
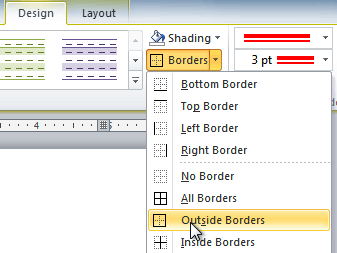
- The border will be added to the selected cells.

